Assignment 4
Assignments | | Links:
In this assignment, you will practice how to initiate an API request, fetch data from the API endpoint, parse the data, and present the data in your app.
I’ve noticed that quite a few people are struggling with previous assignments, so I intentionally rewrote assignment 3 and 4 to make them easier, instead of using prompts I originally planned. Meanwhile, I also wish you to put more time on your final project.
Estimated Time to Complete this Assignment:
- If you are already mastered all materials covered in the lecture, you probably can get this one done ~1-2 hrs.
- If you need to revisit some concepts, you probably still can get this done in ~3-6 hrs.
This assignment’s skeleton code is based on the solution of assignment 2, which should be similar to the starter code of assignment 3.
Stage 1 (30 Pts in total)
Let’s create a picker to let users switch between
QuoteandImages.
In this stage, you will create a picker in the InspirationView to let users switch between QuoteView (you will implement it in the later stage) and ImageGalleryView. This might be the most challenging part of this entire assignment as you have to learn how to use Picker and practice the usage of enum.
Stage 1.1 (15 Pts)
In this sub-stage, you need to go over the official document on Picker from here. You can focus on all code snippets in that document to have a general idea of how to use the Picker. After that, you need to create an enum which will be used in our picker later.
There are some requirements:
- You must create this
enumin the fileViews/InspirationViews/InspirationView.swift. - Your
enummust have and only have two cases. One is namedquotesand another one is namedimages. They represent two different views that users want to display. - Your
enummust conform to theCaseIterableprotocol so that you can use.allCasesto iterate over all cases later in thePicker. - Your
enummust have a computed variable namedname: String, which will return the capitalized string of each case. For example, if yourenumis named asInspirationType, then when you accessInspirationType.quotes.nameit returns a capitalizedString- “Quotes”. If you accessInspirationType.images.name, it returns a capitalizedString- “Images”.
Hints:
You can conform your
enumto theStringprotocol. Then you can get aStringrepresentation of each case in yourenumby using.rawValue.For example (assume your
enumis named asInspirationType), if yourenumconforms to theStringprotocol, you can useInspirationType.quotes.rawValueto get aStringvalue - “quotes”. Or, you can also useself.rawValuein yourenumtoo, which has the same behavior..capitalizedis already defined on everyStringtype variable in the standard library. You can use this handy tool to get the capitalized string.CaseIterableandenumare covered in the previous lecture when we went over the Swift Type Systems.
Grade Breakdown:
- (5 pt) Correctly create the
enumin the right file. - (5 pt) Correctly conform to the
CaseIterableprotocol. - (5 pt) Correctly implement the
namecomputed variable.
Stage 1.2 (10 Pts)
In this sub-stage, you will create the Picker in our InspirationView. Go to the file Views/InspirationViews/InspirationView.swift again, and you will work on this file. TODO comments are available in the skeleton code.
Find the right place and declare your Picker here. The Picker will display two different tabs - Images and Quotes (capitalized). You can use the name computed variable defined in the previous sub-stage.
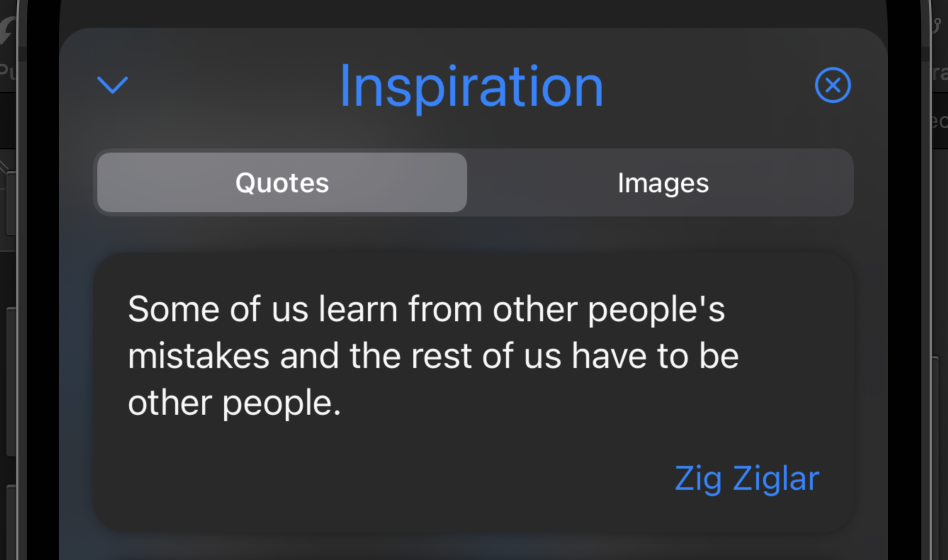
The expected result of this sub-stage should be something like this:
| Image | Interaction with Picker |
|---|---|
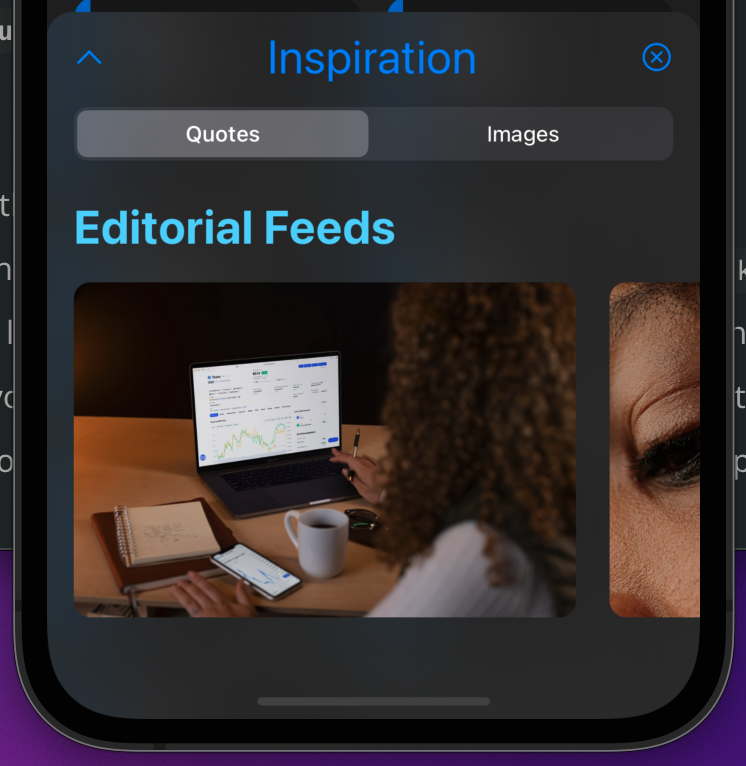 |  |
You must utilize .allCases on enum to loop through all cases in the enum.
Hints:
- We will use
.segmentedstyle for thePicker. - You can apply picker style by calling the view modifier
.pickerStyle()on thePicker. - You can use
EmptyView()for the label of thePicker, as it won’t be displayed in the style we use anyway. - Depends on the different initializers you may use, the title for the
Pickerdoesn’t matter as well. - The usage of
.allCasesis also covered in the previous lecture during the Swift Type System.
Grade Breakdown:
- (5 pt) Correctly declare the
Pickerat the right place with the right style. - (5 pt) Correctly utilize
.allCasesto loop over all cases in thePicker.
Stage 1.3 (5 Pts)
In this sub-stage, you will need to create the QuoteView (you can just leave it as a template file, we will finish it up in the later stage). You will use a switch statement on two views - QuoteView and ImageGalleryView, so that users can finally switch between two views by selecting a different choice in the Picker we declared before.
The expected result of this sub-stage should be something like this:
There are some steps and requirements to follow:
- You need to create a SwiftUI file named
QuoteView.swiftin the folderViews/InspirationViews. You can just leave it as the template file for now. - Go to the file
Views/InspirationViews/InspirationView, and find the right place to add aswitchstatement to conditionally displayQuoteVieworInspirationViewbased on users’ choice. You must use theswitchstatement here.
Grade Breakdown:
- (5 pt) Correctly use the
switchstatement to conditionally display one of two views.
Stage 2 (60 Pts in total)
Let’s create our
QuoteView!
In this stage, we will take a close look at the API we will use. We will create the API service, view, model, and view model for the QuoteView.
Don’t pay anything for the API. The API service we will use in this assignment is hosted and managed by a 3rd-party platform. We will only use the free part of the API service for this assignment.
Stage 2.1 (15 Pts)
In this sub-stage, you will get familiar with the API service we will use for this assignment. We will use the API service provided by ZenQuotes.io.
You can read the full documentation of this API service from their website: https://premium.zenquotes.io/zenquotes-documentation/.
Or, you can also check the payload by directly accessing the endpoint: https://zenquotes.io/api/quotes.
After reviewing the payload returned by the API endpoint, you should see something like this (example from the official document):
[{
"q": "Lack of emotion causes lack of progress and lack of motivation.",
"a": "Tony Robbins",
"i": "https://zenquotes.io/img/tony-robbins.jpg",
"c": "63",
"h": "<blockquote>“Lack of emotion causes lack of progress and lack of motivation.” — <footer>Tony Robbins</footer></blockquote>"
},
// ...MORE DATA... //
{
"q": "The friend is the man who knows all about you, and still likes you.",
"a": "Elbert Hubbard",
"i": "https://zenquotes.io/img/elbert-hubbard.jpg",
"c": "67",
"h": "<blockquote>“The friend is the man who knows all about you, and still likes you.” — <footer>Elbert Hubbard</footer></blockquote>"
}]
Based on this pattern and structure, create a file named Quote.swift in the folder Models. Inside the newly created Quote.swift file, create a struct named Quote to represent each individual “quote”.
There are some requirements:
- You are responsible for creating the right fields with the correct name in your
Quotestruct based on the payload you observe. - You must name all fields in the
Quoteaccording to the field name in the payload. You are not allowed to useCodingKeyshere to customize the field name. However, I do encourage you to do that beyond this assignment. - You are responsible for conforming this struct to the right protocol, which makes the struct can be decoded from a JSON string.
- You might need to set one or more fields to the
Optionaltype, as the payload might not always return all fields that are shown in the official document, or the example above. However, we will not use these fields that are not returned in the payload. Therefore, it’s ok if you just do not declare them in the code at all.
Grade Breakdown:
- (10 pt) Correctly create the file and struct.
- (5 pt) Correctly conform to the right protocol, which makes the struct can be decoded from a JSON string.
Stage 2.2 (15 Pts)
In this sub-stage, you need to create an API service class to provide an interface by which we can initiate the API request and parse the data correctly.
Again, the endpoint we will use is: https://zenquotes.io/api/quotes
There are some steps and requirements to follow:
- First, you must create a Swift file named
QuoteAPIService.swiftin the folderServices. - You must create a class in that newly created
QuoteAPIService.swiftfile. Your class should be namedQuoteAPIService. In your
QuoteAPIServiceclass, you must provide a static async function namedgetQuotes().The full signature:
static func getQuotes() async -> [Quote]?It takes nothing but returns an
Optionalof an array ofQuotes.- In the
getQuotes()function, you need to initiate an API request to the endpoint, fetch the data, and useJSONDecoderto decode the data into an array ofQuotes. - You should handle errors in the function
getQuotes(). If an error occurs, simply returnnil. Aguard letorif letbinding is efficient. - You must check the HTTP response code. Namely, you should check whether the response code is 200, which indicates a successful action. If it’s not, again, return
nil. - You must use
try-do-catchblock onURLSession.shared.data()to catch and print the error if an error occurs. - You must use
try?when callingJSONDecoder().decode(). - The last two requirements are just to ensure you know how to apply different styles of error handling on your own.
Grade Breakdown:
- (5 pt) Correctly check the HTTP response code and return
nilwhen the response code is not 200. - (5 pt) Correctly use
try-do-catchblock onURLSession.shared.data()and print errors if necessary. - (5 pt) Correctly use
try?onJSONDecoder().decode().
Stage 2.3 (15 Pts)
In this sub-stage, you need to create a view model for the QuoteView.
There are some steps and requirements to follow:
- You must create a Swift file named
QuoteViewModel.swiftin the folderViewModels. - In the newly created
QuoteViewModel.swiftfile, you need to create a class namedQuoteViewModelwhich will be the view model to bridge the view and model for quotes. - You must conform to the right protocol for this view model.
- In this
QuoteViewModel, you must have a field -quotes: [Quote]. We will fetch theQuotes via API request and assign the returned array to this variable later. We will also use this variable to displayQuotes in ourQuoteViewlater. Therefore, you must mark this field with the right property wrapper. You must provide a function named
loadQuotes().The full signature:
func loadQuotes() asyncIn this function, you need to call the
getQuotes()function that we just defined in the previous stage in the classQuoteAPIService. If the returned data from thegetQuotes()function is notnil, you need to assign the returned data to thequotesvariable, which is defined in step 4. Otherwise, just do nothing.- For step 5, you must ensure the data assignment happens in the right
Actor. - You are encouraged to check whether the Task is canceled and early terminate the execution in the
loadQuotes()function. This is a good practice.
Grade Breakdown:
- (5 pt) Correctly create and declare the
QuoteViewModeland conform to the right protocol. - (5 pt) Correctly declare the
quotes: [Quote]marked with the right proper wrapper. - (5 pt) Correctly define the
loadQuotes()function and meets all requirements listed.
Stage 2.4 (15 Pts)
In this sub-stage, you need to finish up the QuoteView we created in the first stage. You will also need to link QuoteView and QuoteViewModel up, calling the loadQuotes() function and display all Quotes.
The expected result should be something like this:
| In QuoteView Preview | In InspirationView with Dark Mode | Text Selection Enabled |
|---|---|---|
 |  |  |
You will work on the file Views/InspirationViews/QuoteView.swift.
There are some steps and requirements to follow:
- Declare a local instance of
QuoteViewModelmarked with the right proper wrapper.@ObservedObjector@StateObject? - Replace the template code with your own implementation of the
QuoteView. The layout of each
Quotecard should be like this: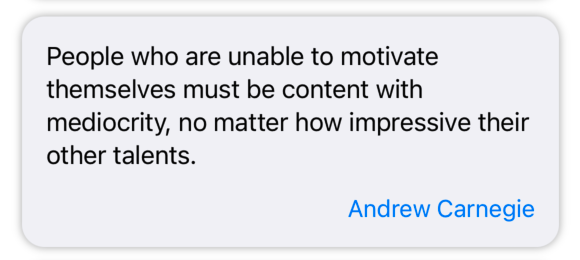
- The quote and author text must both be selectable by long pressing. See the hint section. You don’t need to set up the share functionality when doing a long press.
- You can use the
Color.secondarySystemBackgroundas the background color of each quote card. This color is defined in your first assignment. - You must use
.taskto call theloadQuotes()function. - You can apply a shadow to each quote card, which can add some nice visual effects.
Hints:
- You can use
.textSelection()view modifier on theTextto enable the text selection. - You can use
.multilineTextAlignment()to adjust the multiline alignment behavior for theTextif you need it.
Grade Breakdown:
- (5 pt) Correctly create the
QuoteViewand have a similar layout for each quote and similar behavior as expected. - (5 pt) Correctly use
.taskto call theloadQuotes()function. - (5 pt) Correctly display all quotes as shown in the GIFs or images in the prompt.
Stage 3 (10 Pts in total)
Commit, Push, and Submit
Remember to commit your code changes and push the change to GitHub before the deadline.
Even if you intend to use late policy, you still need to submit your repository link on Canvas before the original deadline to get the 10 points.
Grade Breakdown:
- (10 pt) A valid GitHub repository link is submitted on Canvas before the original deadline.